Connecting with prospects on a personal level is an aspiration for every business. Data from Statista reveals that 78 percent of email marketers use personalized marketing to send more relevant and engaging marketing messages. Besides that, to send personalized emails, you’ve to invest in an Email Service Provider (ESP), and not everyone has the budget.
The good news? Mail merge in Gmail lets you send personalized emails in bulk with Gmail and Google Sheets — for free. Personally speaking, we’re all in for a strategy that helps build bonds with our audience and lends a human touch to our brand. Engage customers better by uncovering details about mail merge in Gmail and how to use it to send personalized emails.
Table of contents
- What is mail merge in Gmail?
- When should you use mail merge in Gmail?
- How to send personalized emails via mail merge in Gmail?
- Advanced features of mail merge in Gmail
- Wrap up
What is mail merge in Gmail?
Mail merge in Gmail is used to send mass personalized emails with Gmail and Google Sheets. First, you’ve to add recipients’ personalized data in Google Sheets and map it with a draft email in your Gmail account to send it.
This method is useful when sending personalized greetings, holiday emails, and team reports. However, this method isn’t for everyone, and let’s discuss when you should and should not use it.
When should you use mail merge in Gmail?
Google allows sending only 100 emails a day for regular Gmail users and 1500 emails a day for Google Workspace users.
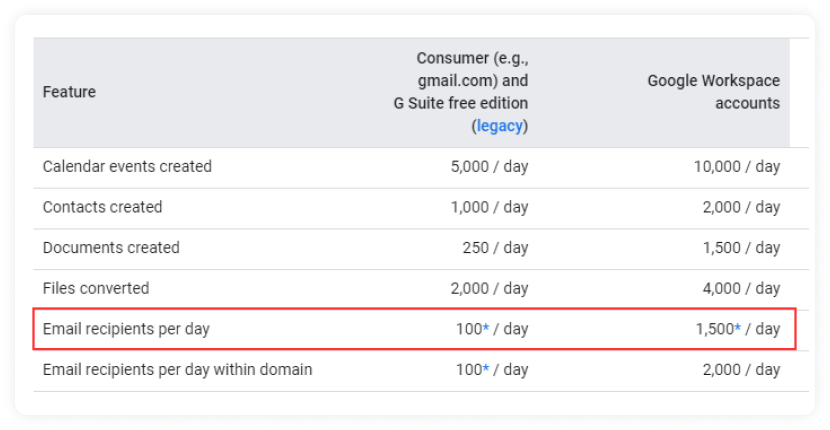
So this method of sending emails is suitable for people who have a small audience, like a business owner who sends discount emails to his small set of customers or a college professor informing his students about a new college via emails.
But this method is not suitable if you’re a big business with a gigantic audience on the scale of tens of thousands. In this case, you must invest in an ESP like Mailmodo to unlock the full potential of personalized emails since Google won’t be able to help you fully.
So now you know its pros and cons, let’s discuss how to send personalized emails using mail merge in Gmail.
How to send personalized emails via mail merge in Gmail?
The entire process involves mainly three steps:
Configuring your Google Sheets
Configuring your draft email in Gmail
Connecting both platforms and sending the emails
Let’s discuss these steps one by one.
1. Configuring your Google Sheets
Follow these steps to set up your Google Sheets.
Visit this link and click on Make a copy. This spreadsheet is an official Google document that contains a helpful script that’ll allow you to send these personalized emails.
The recipient column contains email addresses and adds those you want to send emails to. Each email address should be in a separate row.

- Add the details you want and remove ones that you don’t. Customize this sheet by adding all the personal information users you want to use in your email template. For example, we got rid of the last name for this template since we didn’t need it.

Note: It is not recommended to change or remove the Recipient and Email Sent fields. Or else, you'll have to edit the corresponding code in the App Script, which can mess up your project. So keep them as they are.
2. Configuring your draft email in Gmail
Follow these steps to set up your draft email in Gmail.
- Click on the + and add {{Recipient}} in the To text field.

- Write your subject line and add some personalized information if you want to. For that, you’ve to add the column name inside curly brackets.

- Finally, configure your body text and add your desired personalization the same way you did in the subject line.
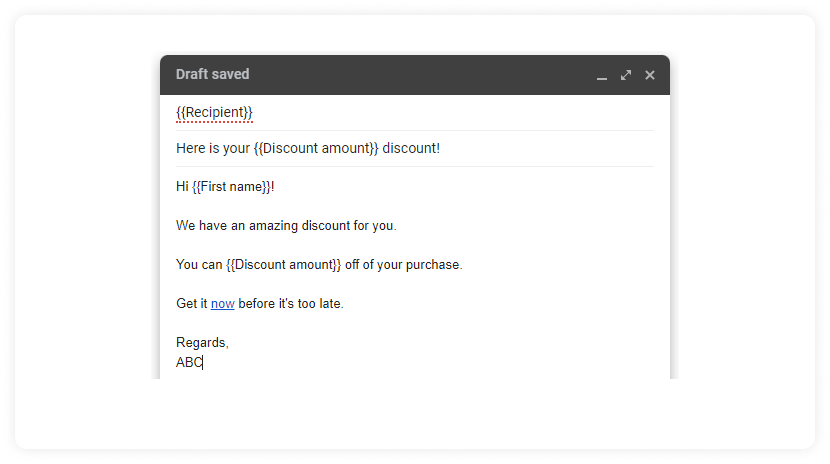
- Now copy the subject line of this email and close the Gmail tab.
Follow these steps in the previous Google Sheet to send your bulk emails.
3. Connecting both platforms and sending the emails
Follow these steps to send your bulk emails in Google Sheets.
- In the top navbar in Google Sheets, click on Mail Merge > Send Emails.

Then it will ask you to authorize the script. Click on Continue in the popup.
Then choose the account in which you have configured your draft email.
Then you’ll see the “Google hasn’t verified this app” popup. On the bottom left corner, click on Advanced.
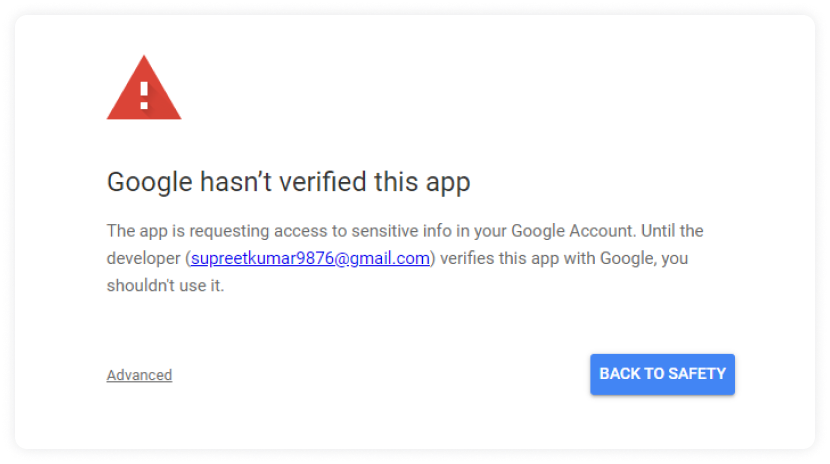
- Scroll down and click on Go to Gmail/Sheets mail merge (unsafe).

- You’ll be redirected to a screen where Google will show you what this script can do and asks you to provide your permission to run this script. Since this is an official script provided by Google, it doesn't contain any malicious code and is safe to use. So scroll down a bit and click Allow.

Now go back to the previous Google Sheet document and click on Mail Merge > Send Emails.
Paste the subject line you copied in the popup and click Ok.
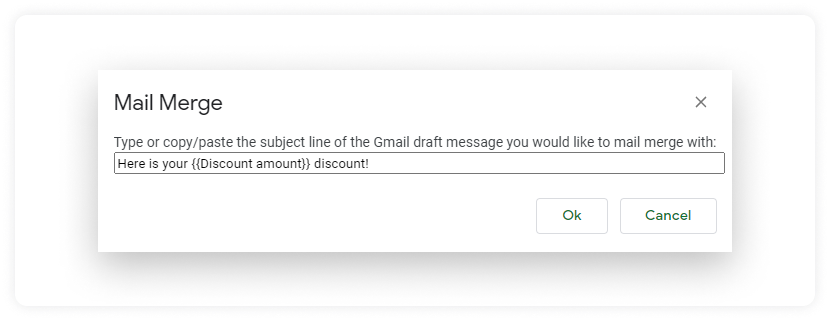
- You’ll now see the date and time in the Email sent column, which means the emails are successfully sent.
So that is how you send bulk emails with Gmail and Google Sheets.
But these are the tip of the iceberg. This script and method give you many other features that can come in handy, and let’s explore them one by one.
Advanced features of mail merge in Gmail
It is very common to send Carbon Copy (CC) or Blind Carbon Copy (BCC) to someone with our email. So if you want to perform these actions, you’ve to edit the script you installed earlier. It may sound scary, but it’s relatively easy, and let’s look at how it’s done.
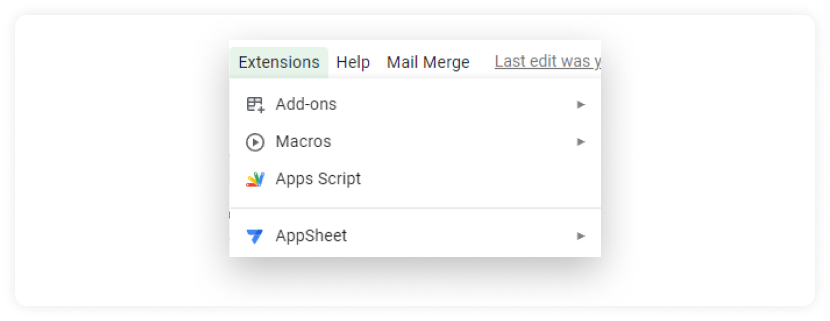
- In the top navbar, go to Extensions > Apps Script.
- It’ll take you to the script page. To find the required code quickly, press Ctrl + F and paste “bcc” in the search bar. It’ll directly take you to the desired code, as shown below.
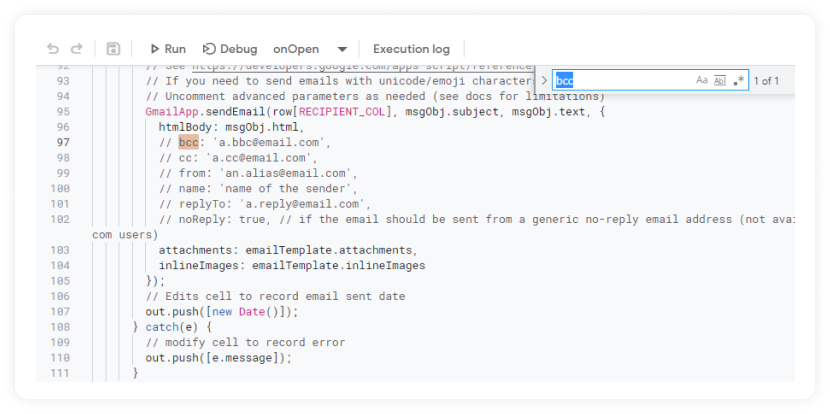
- You can see two forward slashes before the bcc. These are called comments, and programmers use these to make the compiler ignore these lines. To make them work again, remove the two slashes and add the respective value of the property, such as a BCC or CC email address.
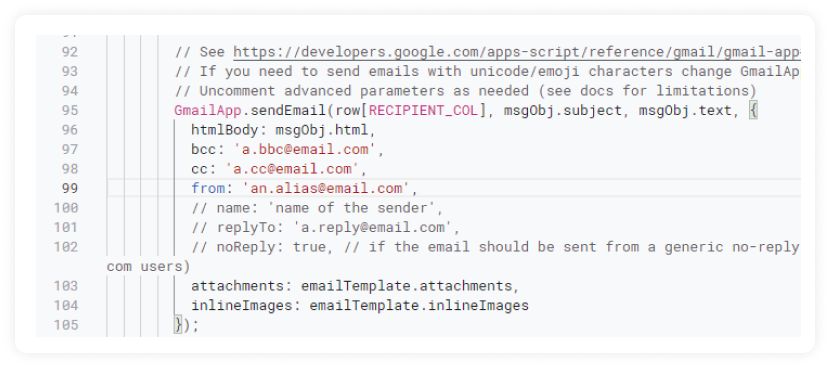
- There are about six properties mentioned in the script, and the first four properties are self-explanatory. The replyTo property lets you set an email to which replies will be sent. The noReply property lets you send emails from a generic noReply email address. Note that the noReply feature is not available for regular @gmail.com users.
Adding attachments
If you need to send the same attachments, add them while creating your draft email, and every recipient will receive this same attachment.
However, suppose you want to send multiple emails with different attachments using Gmail mail merge. In that case, you've to use a third-party extension, and Yet Another Mail Merge (YAMM) is one of the popular options. Here's how to send personalized attachments with YAAM.
Go to this link and install the YAAM extension.
Add your attachments to Google Drive and copy their sharable link.
Create a column in your spreadsheet and name it exactly “Attachment”. In that column, add the link of a particular attachment you want to send to that recipient.

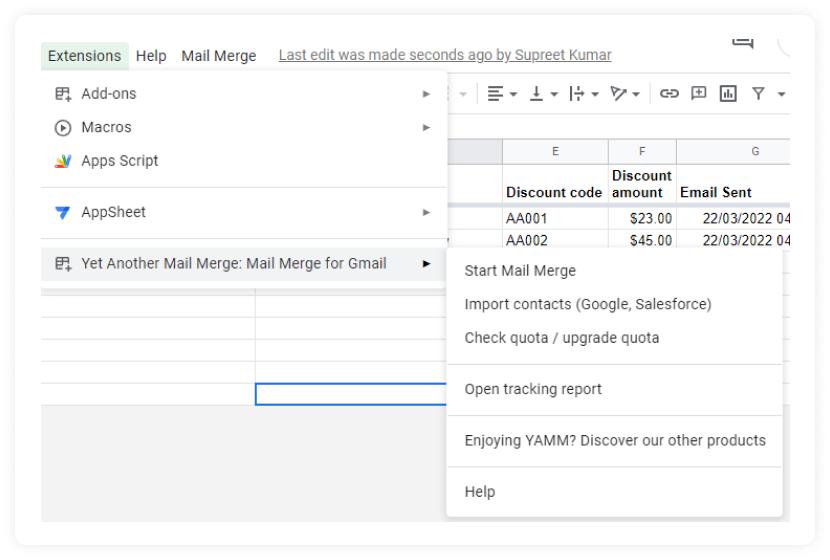
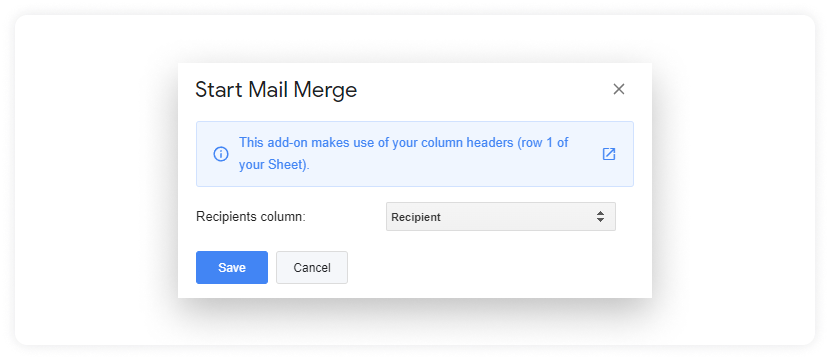
- Then in the top navbar, go to Extensions > Yet Another Mail Merge > Start Mail Merge.
- It’ll ask you to choose the recipient column. From the dropdown, choose the column where you’ve added the recipients’ email addresses and click Save.
- In the next popup, click on Alias, filters, personalized attachments… the link at the bottom.

- YAMM will automatically detect the Attachment column. Now, tick the checkbox that says “Attach files in column C to emails sent” and click Back. It may be column C, B, or D, depending on which column you’ve set up.

- Add your name in the Sender Name field, and from the Email Template dropdown, select the email template you’ve used in your email draft.
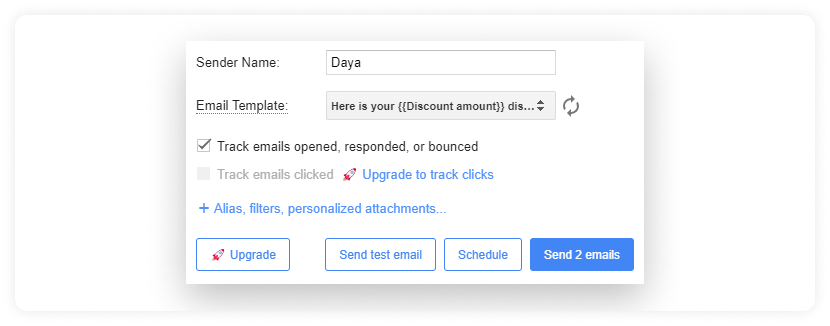
- Then, click Send 2 Emails to send emails. Since we have two columns, it’s saying two emails. If you’ve more columns, it’ll say that number accordingly.
That’s it. That’s how you send personalized emails with YAAM using the Gmail mail merge technique.
Wrap up
You can send personalized emails to only a small audience with mail merge in Gmail. That’s why it’s best to opt-in for a complete email marketing solution like Mailmodo if you serve a larger audience and need advanced personalization features like triggered emails, list segmentation, and personalized AMP email creation.
If you use Outlook then you can check out our guide on how to perform mail merge in Outlook to send more personalized emails.
What you should do next
Hey there, thanks for reading till the end. Here are 3 ways we can help you grow your business:
Talk to an email expert. Need someone to take your email marketing to the next level? Mailmodo’s experts are here for you. Schedule a 30-minute email consultation. Don’t worry, it’s on the house. Book a meet here.
Send emails that bring higher conversions. Mailmodo is an ESP that helps you to create and send app-like interactive emails with forms, carts, calendars, games, and other widgets for higher conversions. Sign up now and send 10k free emails/month. Sign up here.
Get smarter with our email resources. Explore all our knowledge base here and learn about email marketing, marketing strategies, best practices, growth hacks, case studies, templates, and more. Access guides here.

