Keeping your users’ interest is a vital factor in business communications and Intercom helps you achieve it efficiently. Emails are one of the most popular communication channels but unfortunately, Intercom doesn’t provide you with a robust platform to achieve its full potential.
Fortunately, Mailmodo provides everything you need in your email marketing arsenal. And we are also proud to be the best platform to experience AMP emails.
Table of contents
- Does Intercom have AMP emails?
- Benefits of using Intercom integration with Mailmodo
- How to send AMP emails from Intercom using Mailmodo
- Wrap up
Does Intercom have AMP emails?
Intercom gives you four different types of templates to create emails: plain, personal, company, or announcement templates. These let you create simple static emails and you can use these to get your foot in the door. But if you want to send highly personalized, automated, and interactive emails, you will love Mailmodo.
However, if you’re already using Intercom and have all of your systems set up in it, don’t worry. You can use our Intercom integration to integrate both platforms and enjoy the amazing benefits discussed below.
Benefits of using Intercom integration with Mailmodo
Here are some ways in which Mailmodo helps you add life to your email campaigns:
We help you create AMP emails that drive high conversions. And in fact, Razorpay and Murdex have increased their conversions by 257% and 280% respectively when they used Mailmodo.
We have kept a low number of steps from our end, so you can set up your workflow within minutes.
We have also designed beautiful templates for you to use and set up your triggered email campaign quickly.
Creating your own templates is also easy with our drag-and-drop email builder. No coding is required.
How to send AMP emails from Intercom using Mailmodo
Follow these steps to set up a triggered AMP email campaign with Intercom integration:
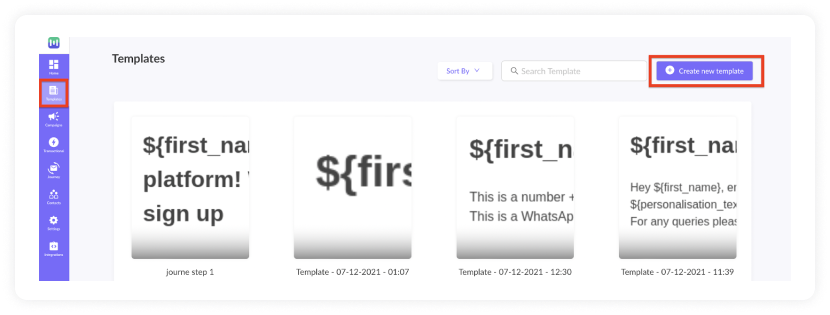
- Go to templates from the vertical menu on the left side. Click on create new template.
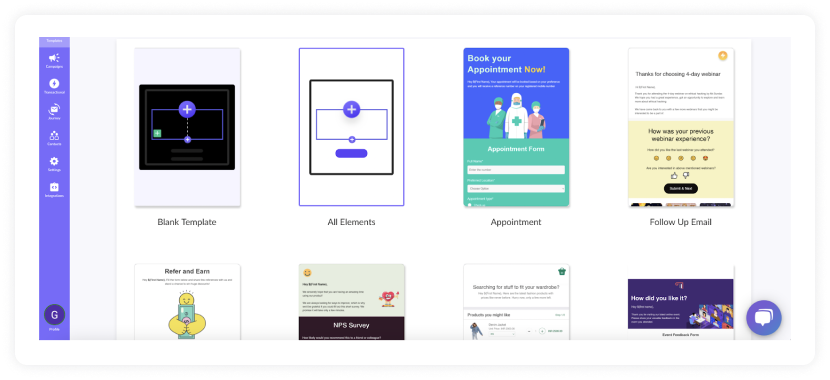
- Either select a blank template or a pre-made template.
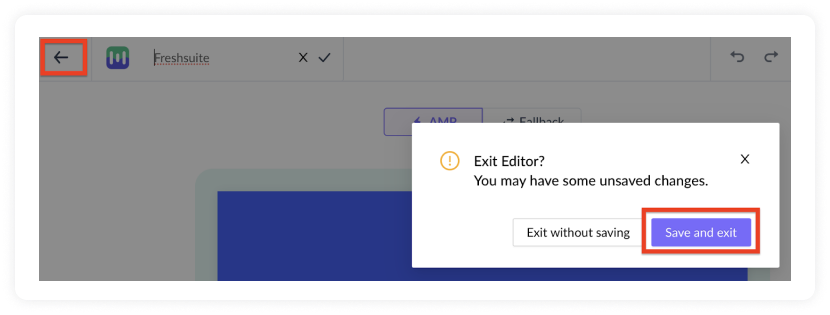
- Use the editor to edit the template. Save and rename the template upon completion. After saving, click on back arrow.

- Click on save and exit.
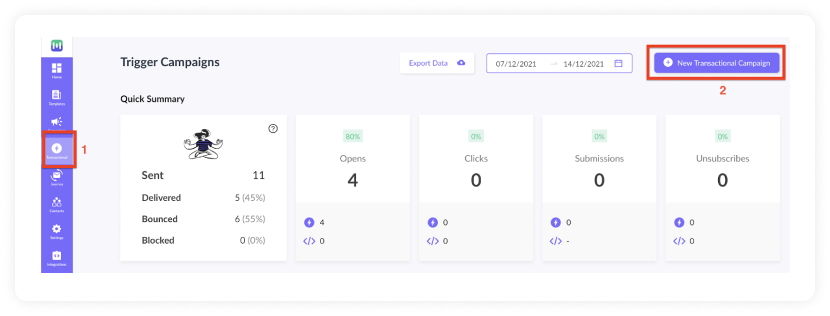
- You will be redirected to the home page. Click on transactional from the vertical menu on the left. Next, click on New Transactional Campaign.
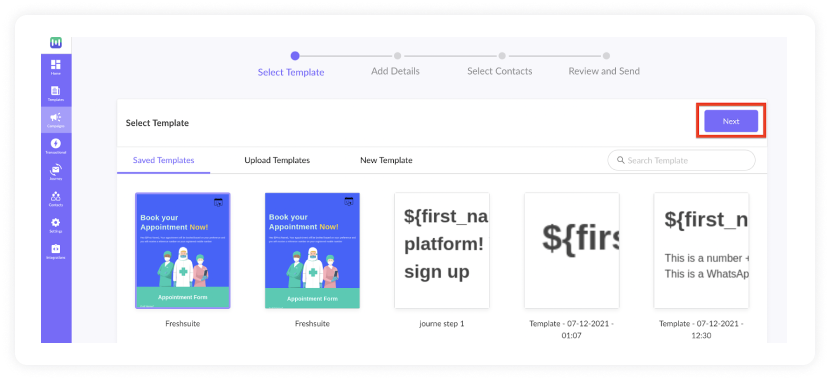
- Select the template you saved before. Click on next.
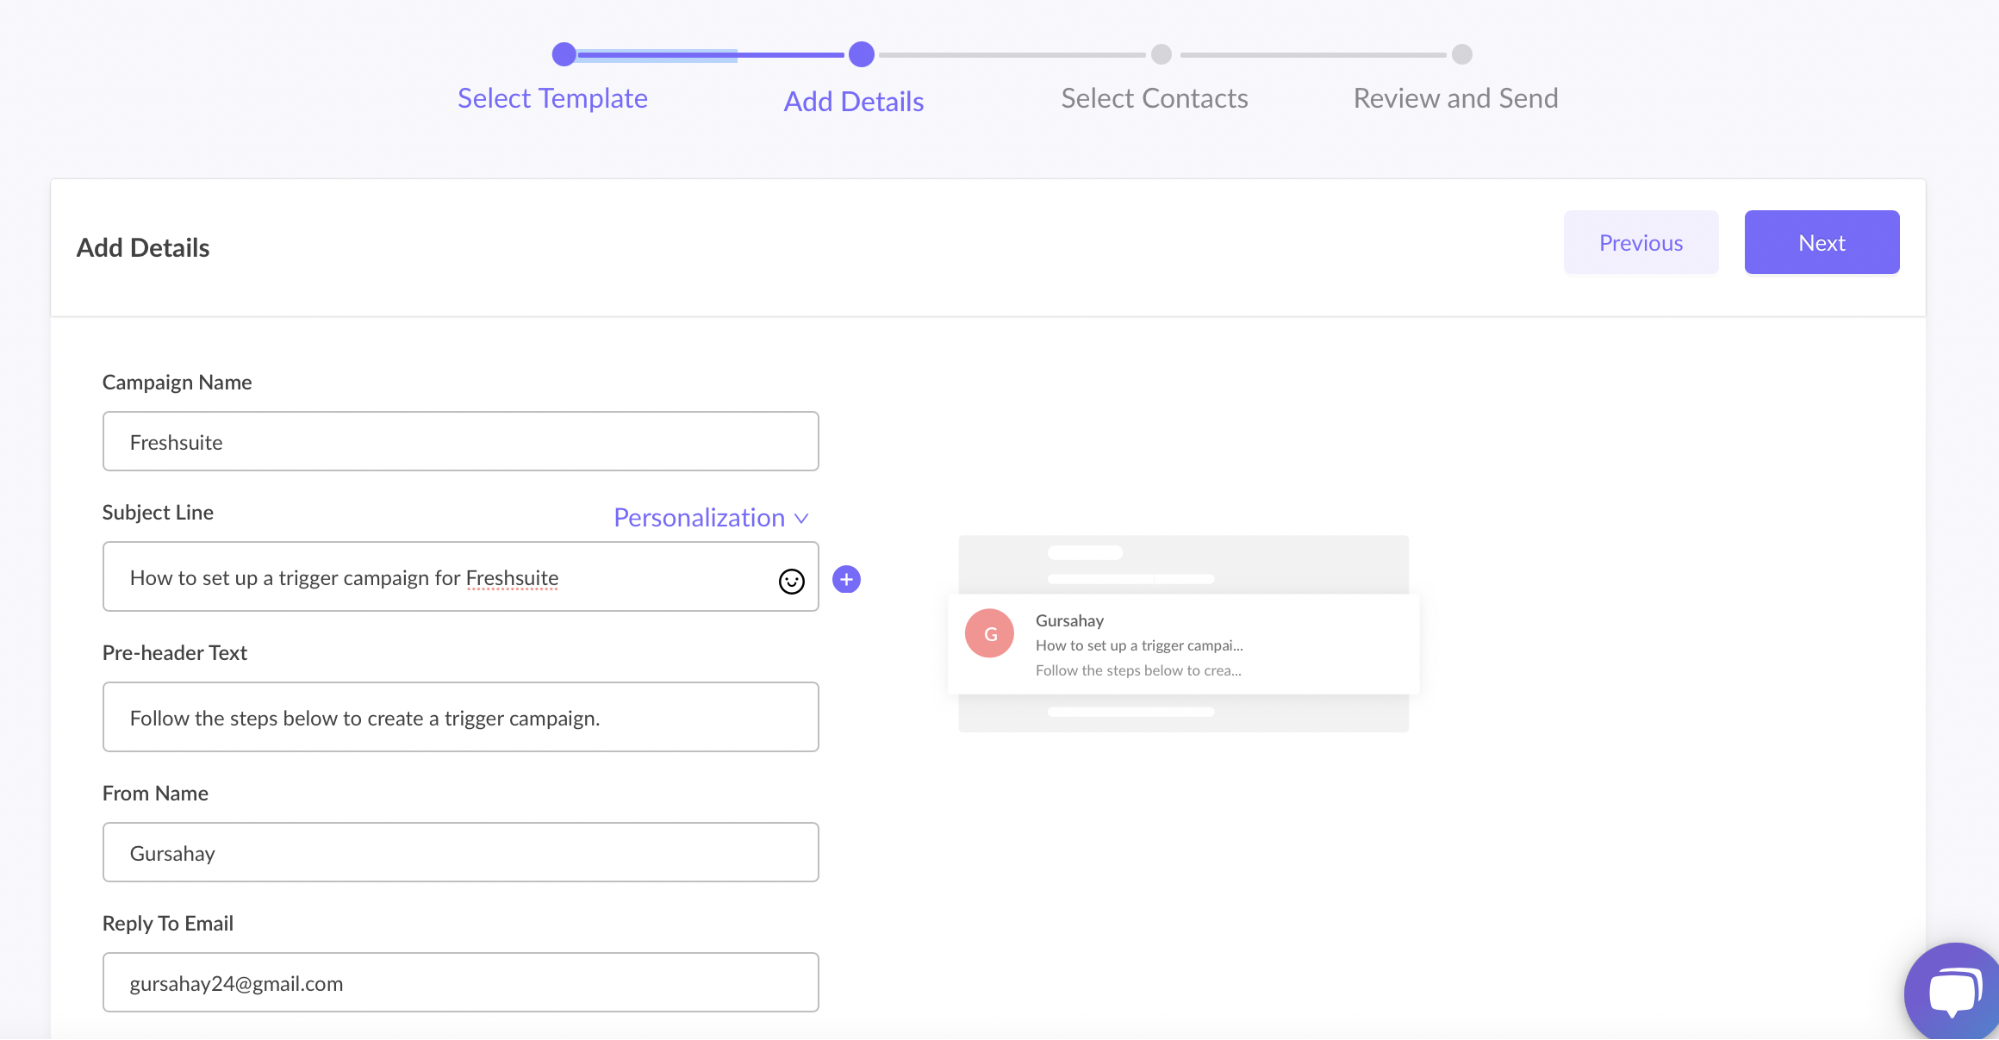
- Add Subject Line, Pre-header text, From name, and Reply to email. Click on next.
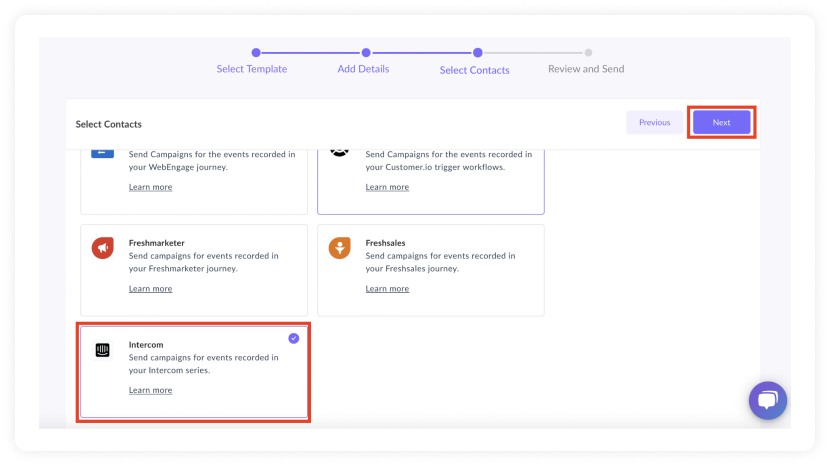
- You will be redirected to trigger on events. Select Intercom from the list of platforms. Click on next.
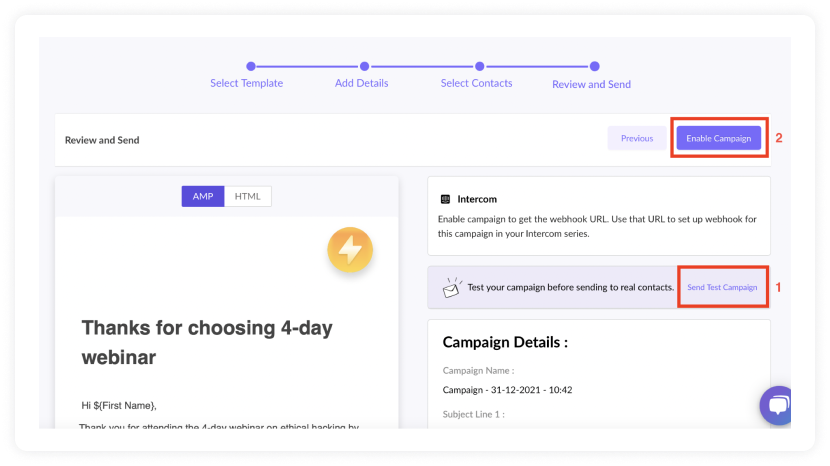
- Review and test your campaign. To test, click on send test campaign->enter email ID->send test email.
Once tested and reviewed, click on enable campaign.
- You will be redirected to Trigger Info section. Click on the Copy URL button. We will use this webhook URL in the Intercom series.
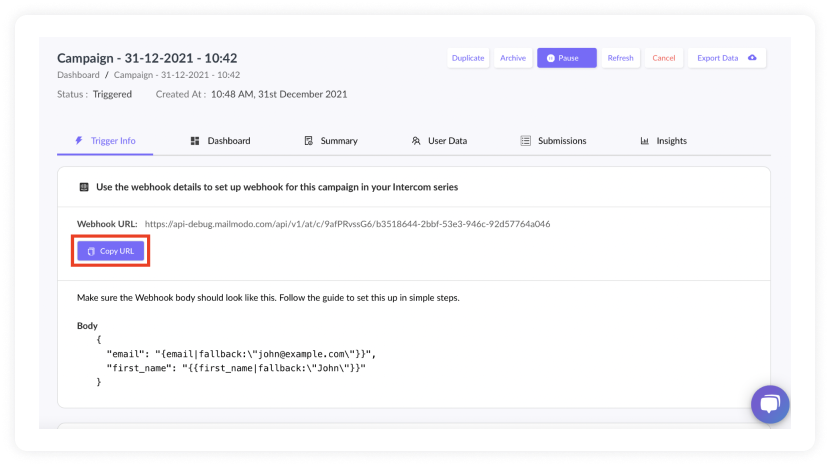
To access this page in the future, go to transactional in the vertical menu (left side)->select the campaign->trigger info.
Intercom setup
- Go to outbound->select series.
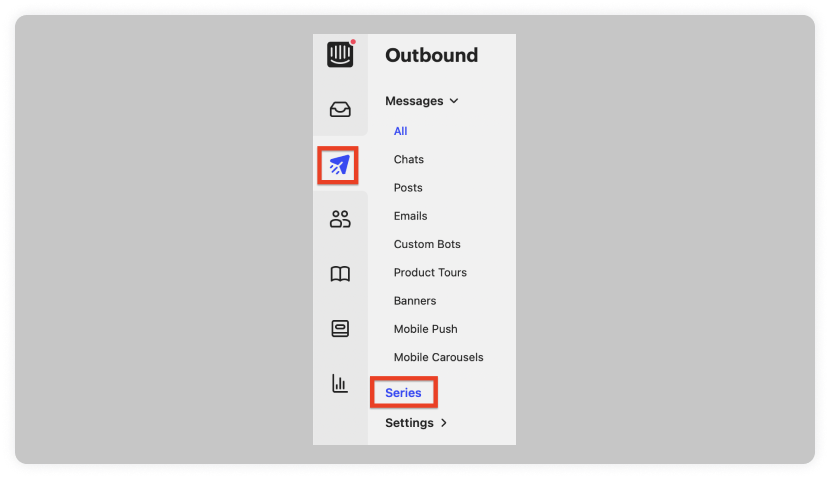
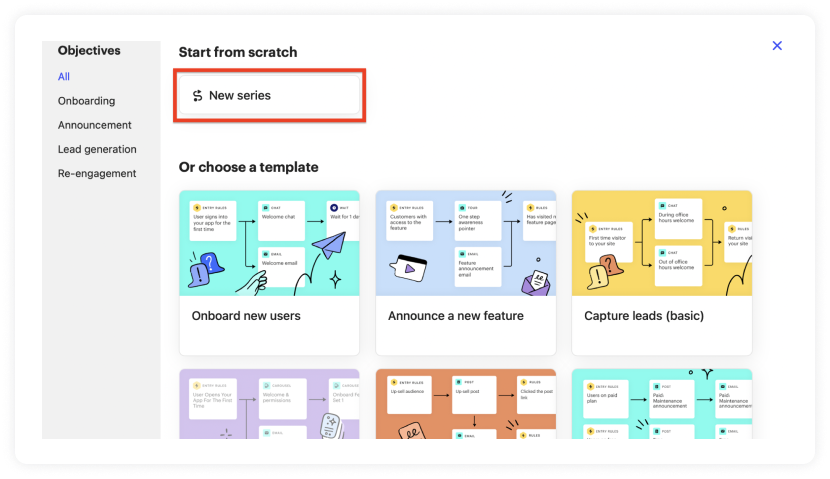
- Click on new series.

- A popup will open. Click on the new series under Start from scratch.
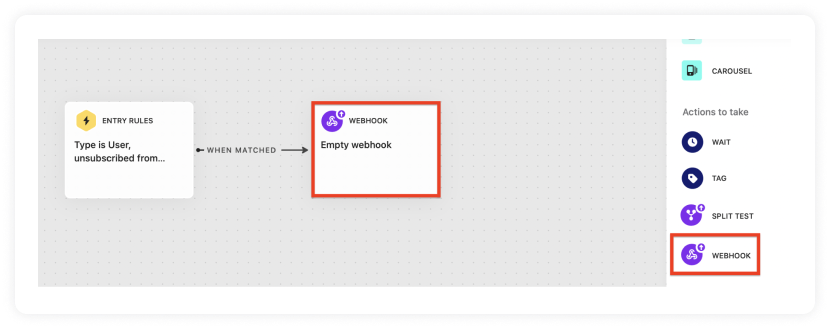
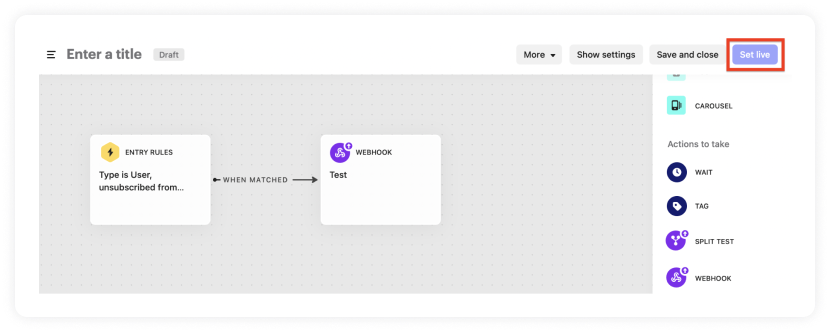
- Create the desired series. Select webhook from the Actions to take the section on the right side. Drag and drop it in the series builder area. Connect the respective Rules and Actions with arrows. Click on the webhook block.
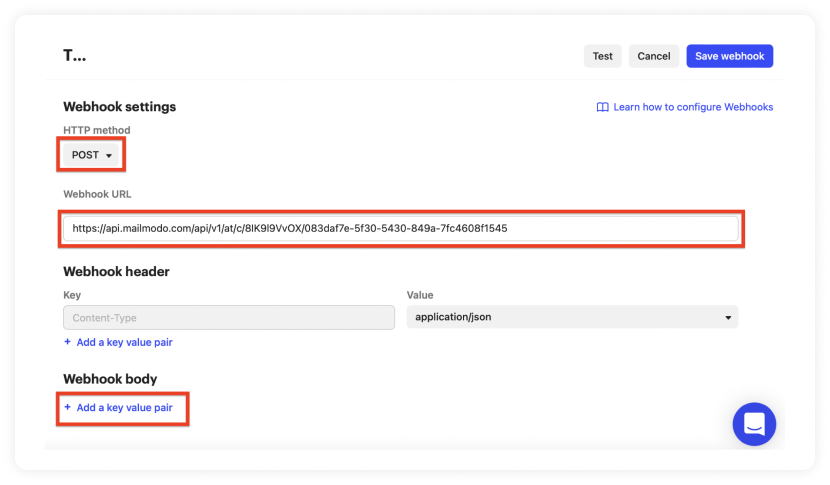
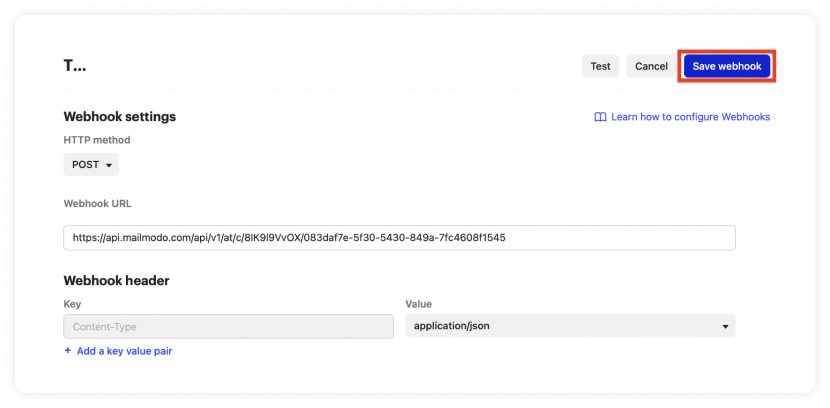
- A pop-up will open. Select HTTP method as POST. Paste the webhook copied from Mailmodo's trigger info section. The default key-value pair under the Webhook header should be Content-type (value) and application/JSON (value).
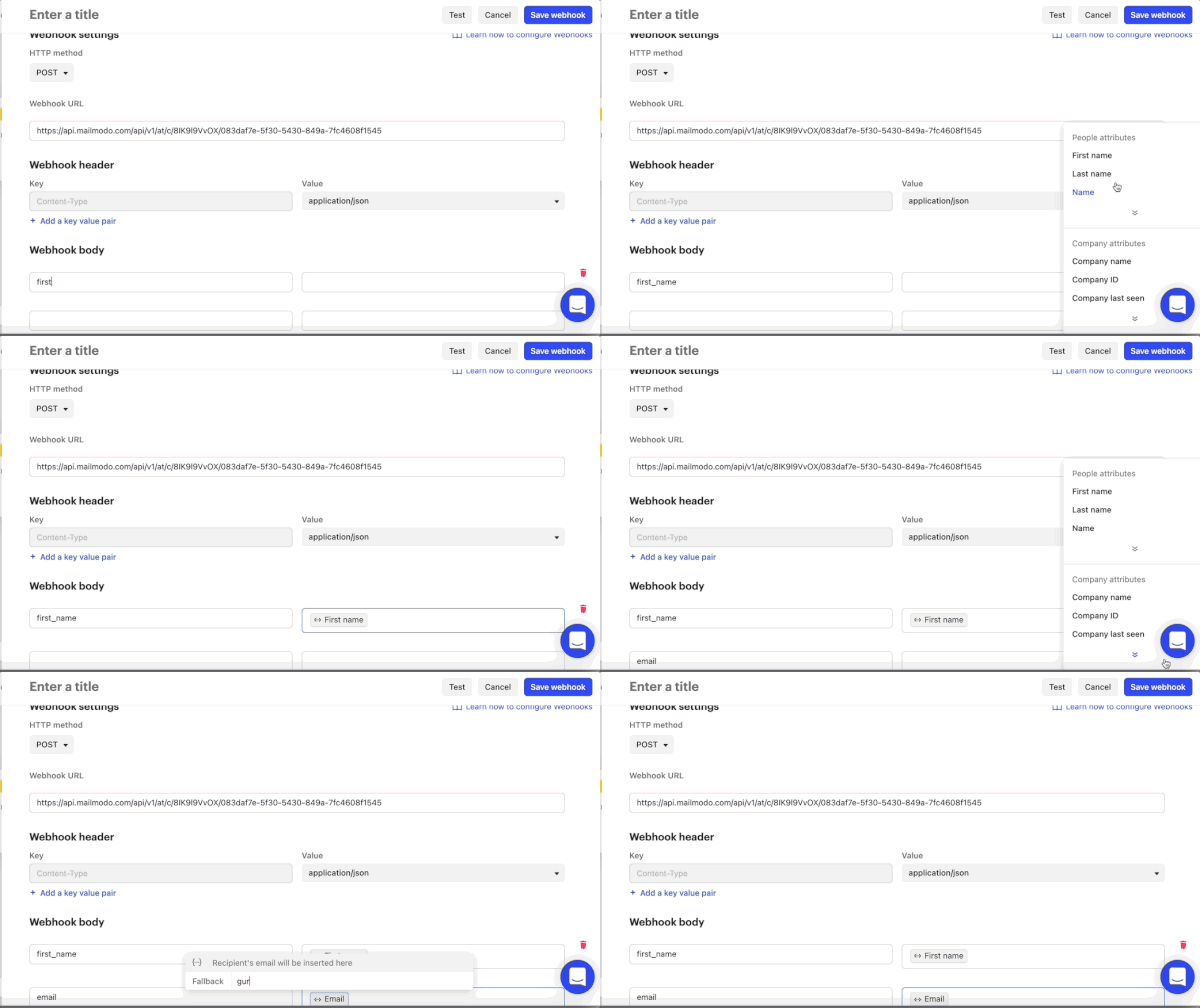
- Click on Add a key value pair. Map the respective parameters as shown below.
- Click on test. Your payload should look like this. Search for a user to whom you want to send a test email (the user should be added to your contact list). After selecting the test user, click on run test.
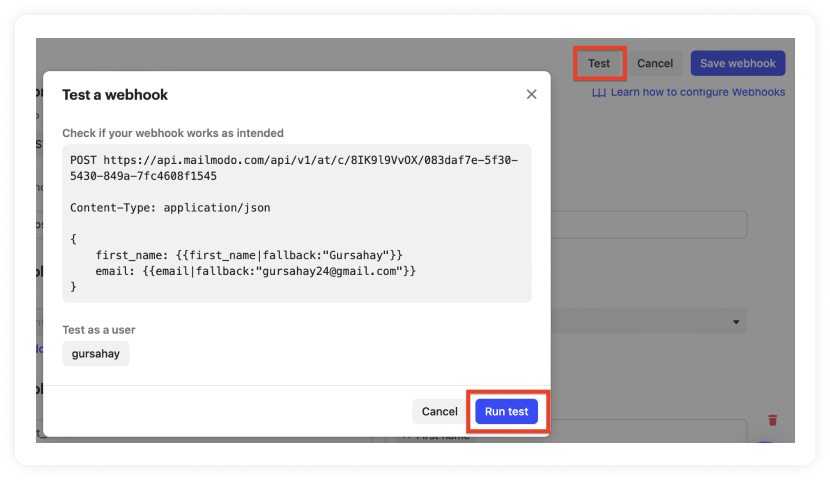
POST https://api.mailmodo.com/api/v1/at/c/8IK9l9VvOX/083daf7e-5f30-5430-849a-7fc4608f1545
Content-Type: application/json
{
    first_name: {{first_name|fallback:"John"}}
    email: {{email|fallback:"john@example.com"}}
}
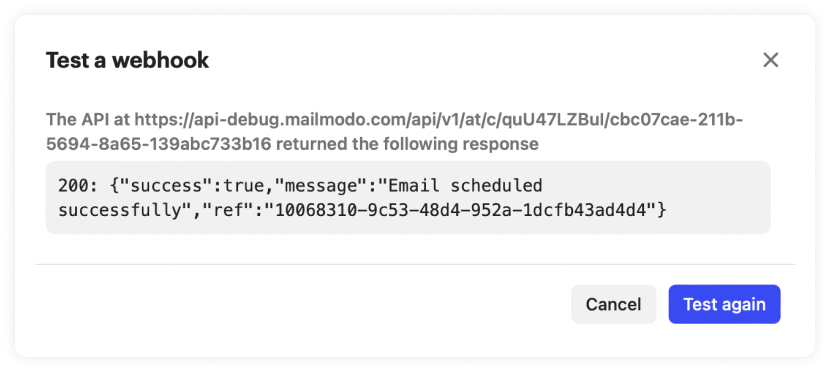
- You should receive a 200 Success code.
- After successful testing, click on Save webhook.
- Click on Set live.
You have successfully created a trigger campaign!
Wrap up
Mailmodo is your all-in-one email marketing solution you can rely on and take your conversions to the moon. If you ever get stuck with an issue, our customer success team is always happy to help. Don’t hesitate to reach out.
One of the best ways to know if something work is by trying it out. So sign up for Mailmodo today to take full advantage of AMP emails!
What you should do next
Hey there, thanks for reading till the end. Here are 3 ways we can help you grow your business:
Talk to an email expert. Need someone to take your email marketing to the next level? Mailmodo’s experts are here for you. Schedule a 30-minute email consultation. Don’t worry, it’s on the house. Book a meet here.
Send emails that bring higher conversions. Mailmodo is an ESP that helps you to create and send app-like interactive emails with forms, carts, calendars, games, and other widgets for higher conversions. Sign up now and send 10k free emails/month. Sign up here.
Get smarter with our email resources. Explore all our knowledge base here and learn about email marketing, marketing strategies, best practices, growth hacks, case studies, templates, and more. Access guides here.

