You can't expect to build a loyal customer base by sending only one email, i.e., a welcome email after user sign-up. You need to send a series of emails to nurture them, keep them engaged, and convert them into paying customers.
But you can't write a gazillion emails and send them to each subscriber as that would be tiresome, won't it? That's where the automated email sequence comes in. With automating email flow, you can save time and get a higher return on your email campaigns.
We have written this guide to help you understand the nitty-gritty of setting up 5 different types of email sequences. Let's begin.
Table of contents
- What is an email sequence?
- What are the benefits of an email sequence?
- 5 types of email sequences you can set up
- How to build an email sequence with Mailmodo
- 5 tips for building an email sequence that converts
- Wrap-up
What is an email sequence?
Email sequence or sequence emails refers to a series of emails that you can send automatically using automation software to your subscribers. These emails are triggered by predefined criteria set by you, which can be either time-based or event-based.
| Time-based sequence emails | Event-based email sequences |
|---|---|
| These emails are sent on predefined intervals set by you. These emails are sent on predefined intervals set by you. For example, |
Trigger-based emails are sent when users take a specific action defined by you. Some examples of trigger-based emails are: |
You can create email sequences to achieve your email marketing objectives. Some of them can be:
To nurture leads into paying customers.
Re-engage with inactive users.
Keep users updated with new information.
Build brand awareness and loyalty.
What are the benefits of an email sequence?
Here are the 3 benefits that will compel you to prepare your email sequence today:
✅ Help scale your business
You can scale your business with a one-time effort by reaching out to your email subscribers as sequences work on automation. All you need to do is map users' journeys, define criteria to trigger emails, and you are good to go.
✅ Help understand user's journey
Mapping your user's journey is fundamental to setting up effective sequence emails. In the process, you get to deep dive into the user's pain points, develop ideas to solve them, and engage with them more personally. The more aware you are of the user's journey, the more relevant and personalized email you can send, and more users will feel happy with your brand.
✅ Help retain your customers and build a loyal customer base.
Email sequence helps you retain your existing customers by sending them post-purchase emails such as loyalty emails, gamification, etc. You can set up re-engagement emails to send them content to keep them engaged and turn them into loyal customers. The stronger your customer base, the more leads you can generate through referrals recommendations and thus scale your business.
Related guide: 5 Hacks to Boost Your Returning Customer Rate Using Email Marketing
You need to set up the right email sequence across different user journey stages to avail of these benefits. That's what we will be discussing next.
5 types of email sequences you can set up
Here are the 5 types of email sequences you can set up to nurture, engage and convert leads into paying customers:
1. Welcome emails sequence
The welcome email series includes emails sent to new subscribers to greet them and make them aware of your brand. The subscribers just signed up, so they are interested and excited to hear from you. This makes welcome emails great as you will get higher opens and clicks-through and build trust among new users.
Since users are new and want to hear from you, it's a great opportunity to:
Show appreciation by thanking users for signing up.
Talk about your brand's story and values.
Ask subscribers to connect with you on social channels.
Let users know what they can expect from you - email content type, frequency of emails, etc.
Benefits they can get as part of your email list.
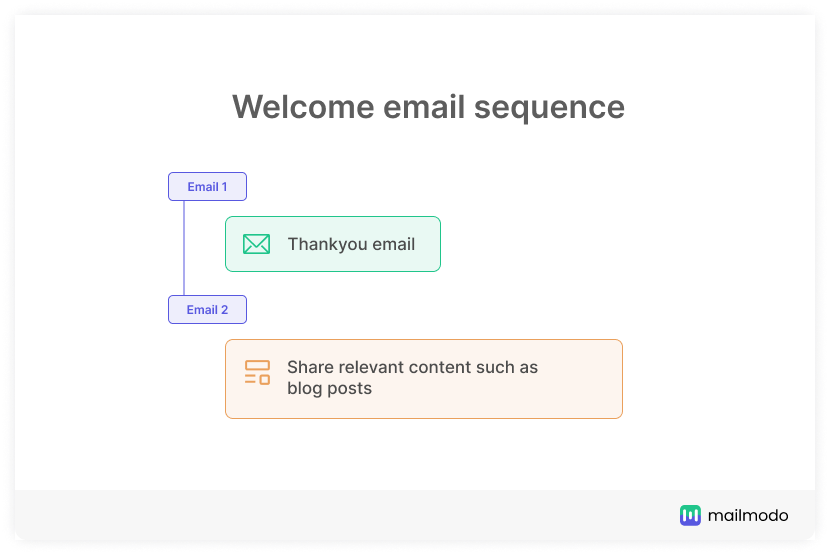
Welcome email sequence example:
2. Onboarding email sequence
Onboarding emails are crucial to enriching customer experience and reducing churn rate in the long run. The more powerful your onboarding is, the more likely users to become loyal customers and less likely to churn.
An email marketing strategist and copywriter, Van Giesler defines onboarding using her dinner party analogy. She says when you go over to dinner at someone's place, they don't shove the dinner on your face. You walk in, they greet you, show you around, and make you feel comfortable at their home. Then, before dinner, you are served appetizers accompanied by the conversation, and then after that, dinner.
So, onboarding your new subscribers works the same way. Onboarding is your chance to accompany them with your product or services, resolve their issues (if any), highlight your product's pro benefits and ensure that they have a great experience.
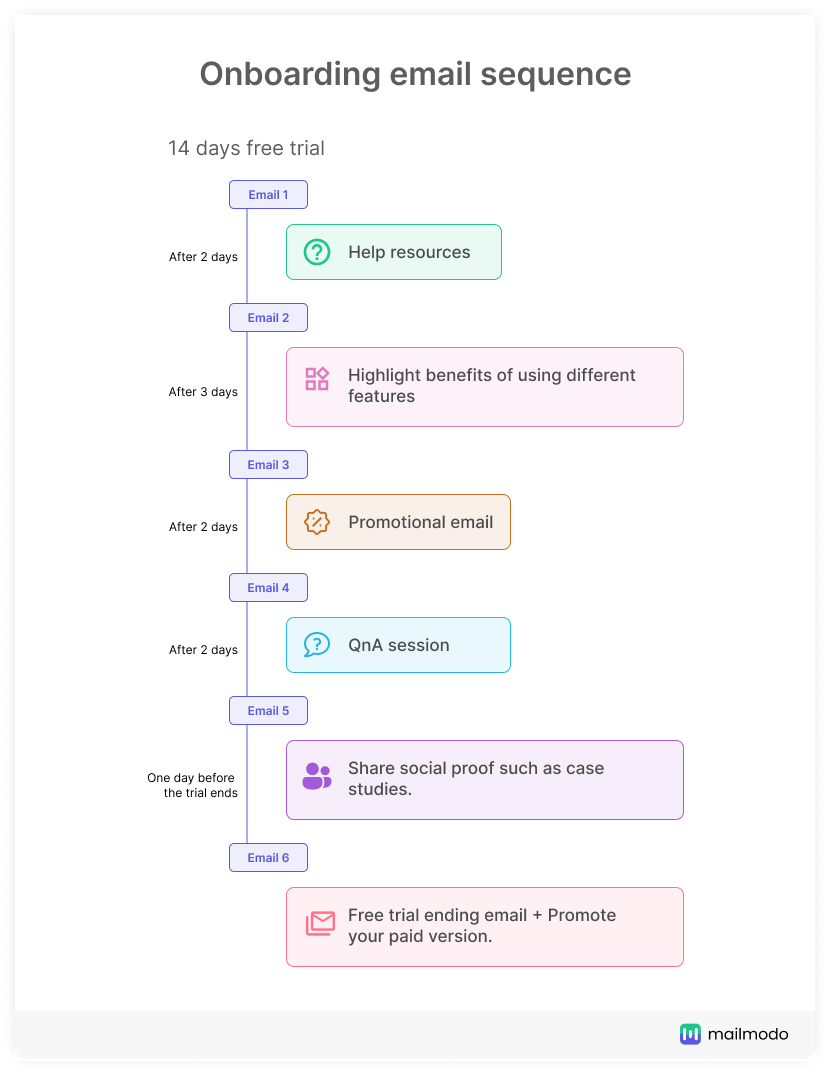
Onboarding email sequence example:
Related guide: A Complete Guide to Creating Engaging Onboarding Emails
3. Abandoned cart recovery sequence
Customers browsed around your site and added items to their cart, but as the time to checkout came, they closed their device and went to watch their favorite TV show. Huh! Might you think all that effort is for nothing? But that might not be the case. There are many reasons user abandon their cart:
Your payment process doesn't look secure.
There are so many steps to checkout.
The total cart amount exceeded the user's budget as they couldn't find any coupons.
They were browsing for fun.
Whatever their reason is, you must engage with these users to generate sales or at least try to if they genuinely want to buy. You can lose $4 trillion of revenue to abandoned acts, as per Business Insider. But, take a deep breath! You can recover this loss using abandoned cart sequences.
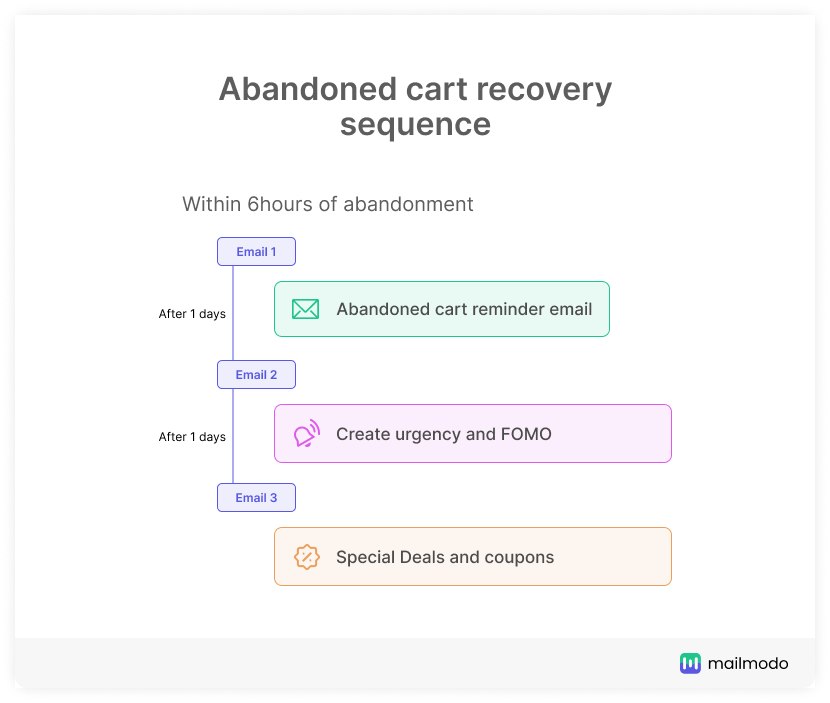
Abandoned cart recovery sequence example:
4. Re-engagement email sequence
Re-engagement emails are sent to existing customers who stopped interacting with your emails over time. The purpose of these emails is to win them back.
Here are two things you need to answer first:
How long does a subscriber have to be un-engaged to send them re-engagement emails?
After you decide to stop sending them re-engagement emails and unsubscribe them from your email list, how many emails?
Well, the answer to these questions is again - it depends. It depends on your industry, target audience, email campaigns, or marketing goals. A study done by the Active campaign gave mixed results, but overall you should wait for 30-60 days to send re-engagement emails. And experts at active campaigns think you should send at least 3 re-engagement emails before removing users from your email list.
If users have stopped engaging, they must need more than just a Hey! Come back email. You must give them reasons or benefits of why they should engage with your emails.
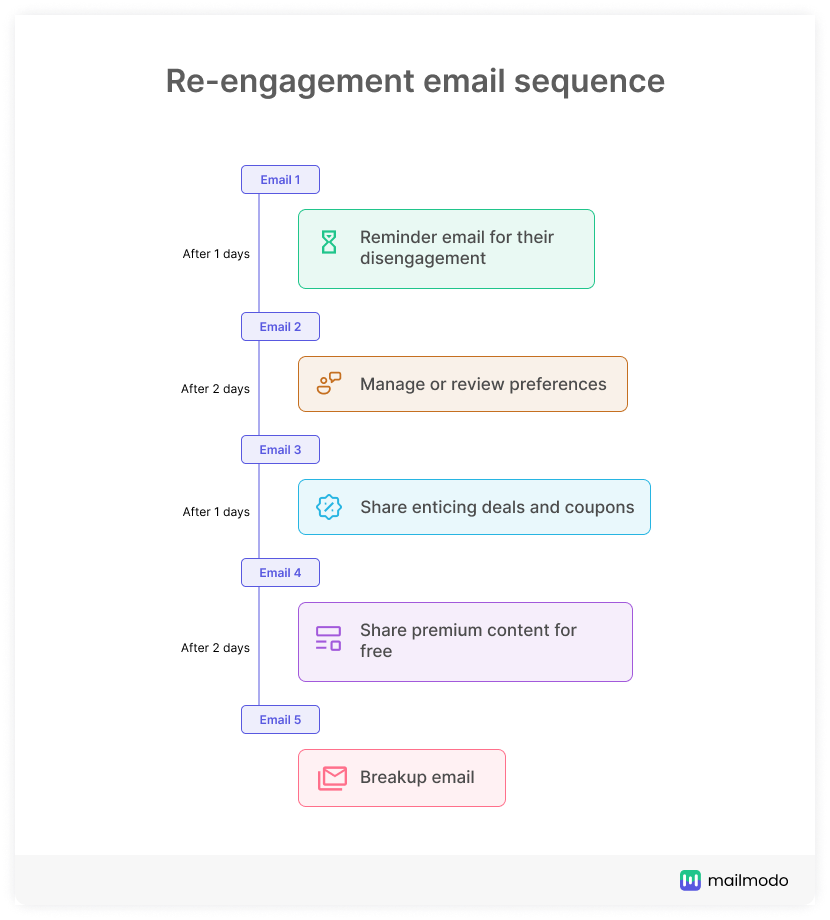
Re-engagement email sequence example:
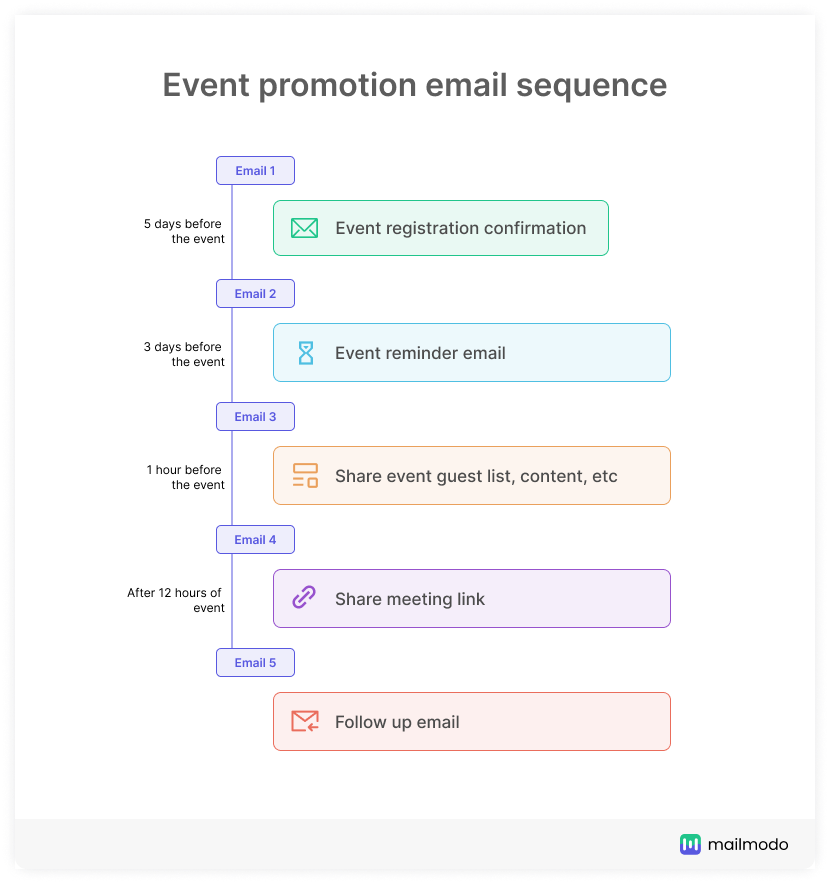
5. Event promotion email sequence
Suppose you have an upcoming event such as a webinar; you can set up an event email sequence to promote and get more registration and awareness. The main goal of such emails is to get more registration and keep registered users updated about the same.
Event promotion email sequence example:
How to build an email sequence with Mailmodo
In Mailmodo, you can create an email sequence through our Journey Builder feature. We will take you step-by-step on creating journeys and tracking their performance.
Step 1: Decide the sequence type, the number of emails, and the email template
Begin with deciding the kinds of email sequences you want to create.
Then you need to decide how many emails will be there in this sequence. For instance, you may have 5 emails in your onboarding email sequence.
After deciding that, you need to choose templates to begin with. You can either choose a pre-made template or create a new one.
Then, click on "Create a journey."
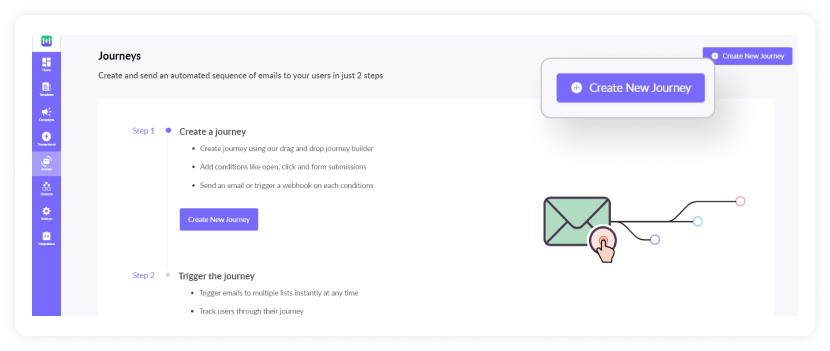
Step 2: Build your email sequence in Mailmodo's Journey Builder
- As you enter the dashboard, you will see a Start option on the screen and fill out the following details: Sender name, recipient address, and reply-to email address.
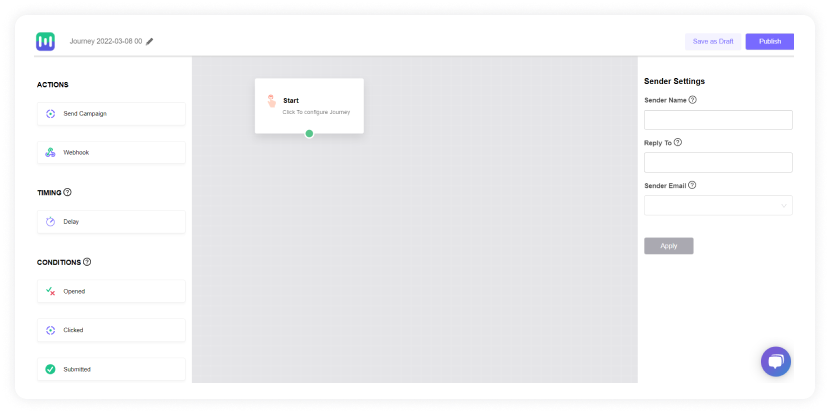
Then drag and drop the Send campaign option.
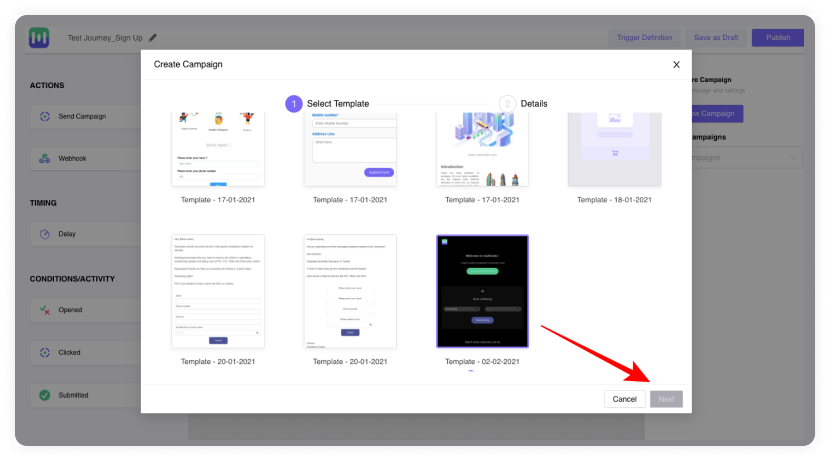
Once you do that, then choose the campaigns for the sequence. Here, you can choose from the existing campaigns or create a new campaign.
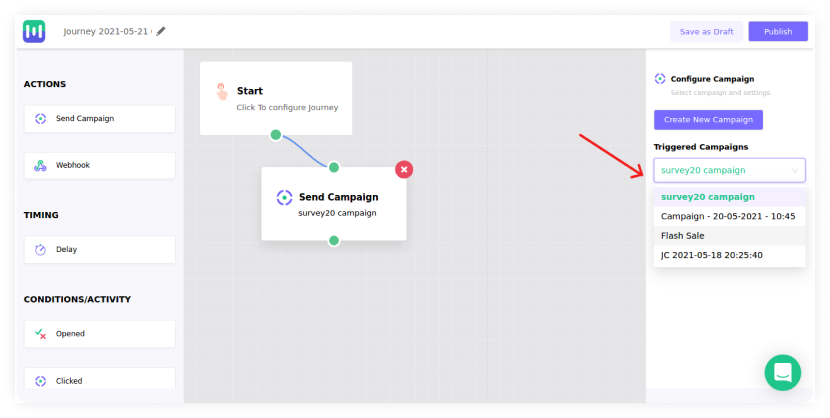
If you've selected to create a new campaign, you need to create an email from scratch. Again, you can choose existing templates or create a new one.
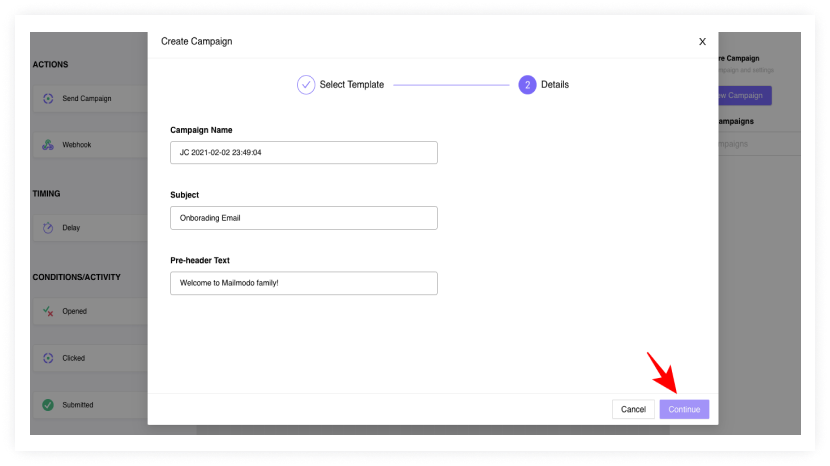
- After that, write the subject line, preheader text, and give it a campaign name for your reference.
Step 3: Specify conditions to trigger emails
Once you have finalized or created the email campaign, you need to specify trigger conditions to automate the flow. You can apply three conditions:
Opened: Yes or no
Clicked: Yes or no
Submitted: Yes or no
- Opened
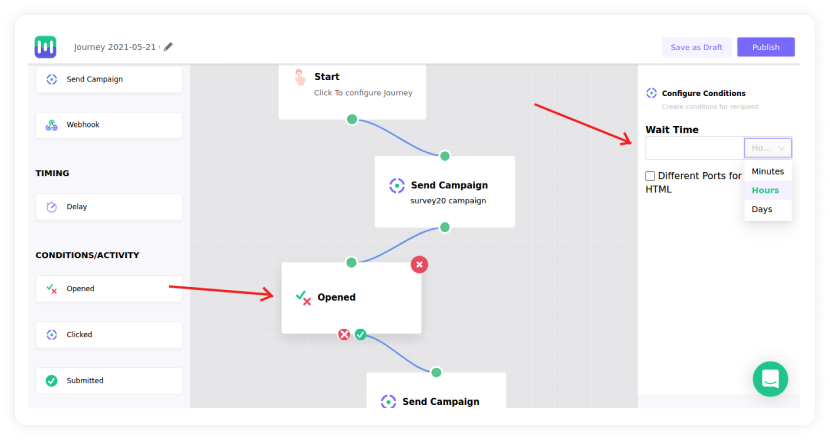
Apply this condition and configure the wait time. Wait time is the time gap between when the users opened or not opened the email and then sent the next email in a series.
You can also use different campaigns depending on whether AMP or HTML email has been opened by selecting different ports for AMP and HTML in the Configure Conditions.
- Clicked
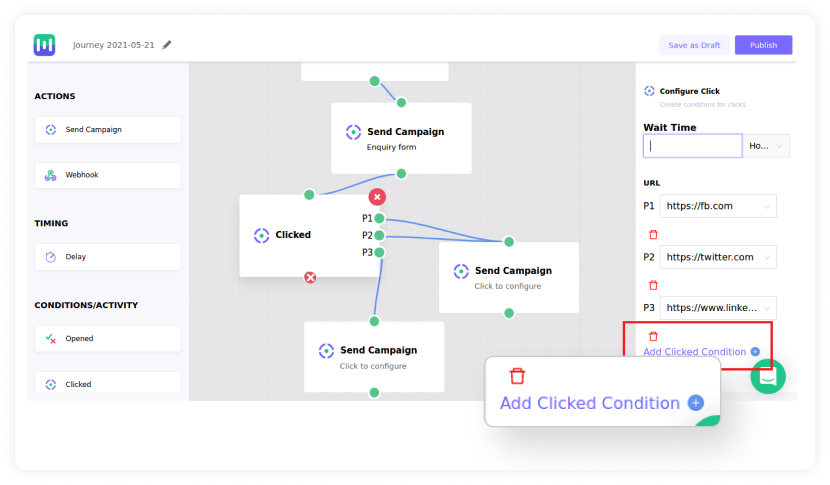
If users click a link in the email, you can send them the next email in the series after a certain delay specified by you. If you want to track clicks on all the links in the email, you can specify that too - Click on Add link condition. Now, you can send emails based on specific links clicked by users.
- Submitted
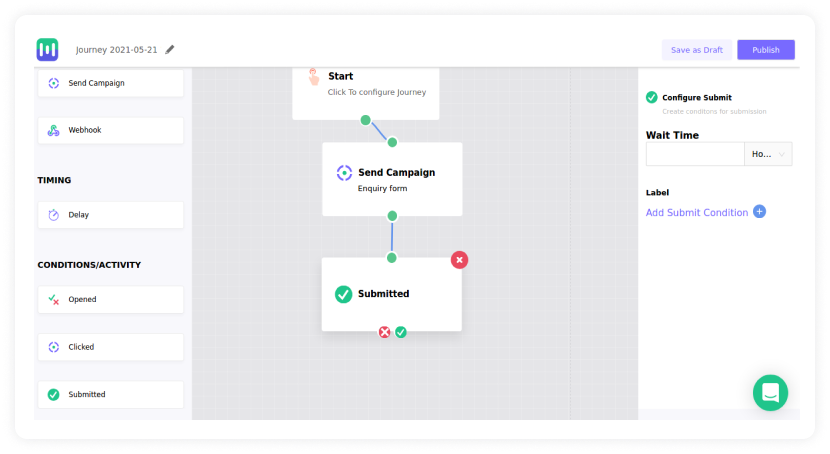
If you send a form or poll and need submission, you can use this condition the same way as opened and clicked. 'Add Submit Condition' creates some conditions/logic on the data received from the submitted form. Different labels ( P1, P2, etc.) are assigned to the conditions, and related campaigns can be launched below.
Other conditions you can use are
- Delay
To delay sending an email in the series.
- Webhook
To integrate with other software such as Calendly for meeting bookings Shopify for cart abandonment series.
Step 4: Launching the email sequence
After you have prepared the email series, click on the Publish button in the right corner of the page. It means your journey is saved, but it's not active.
To make your email sequence live, click on the Start journey option.
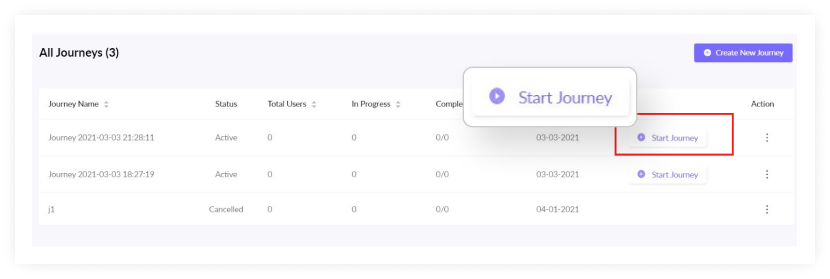
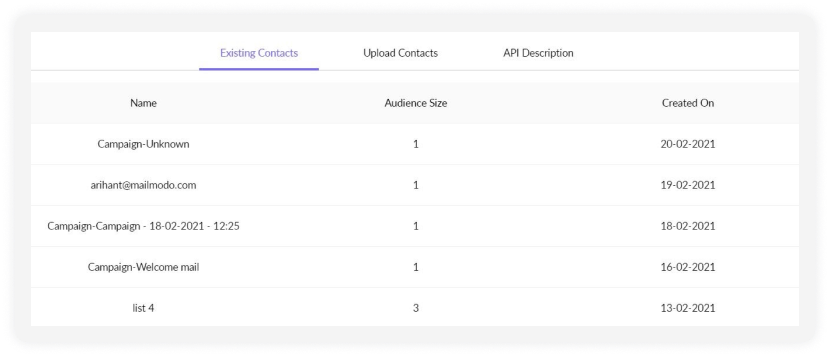
Then add a list of contacts you want to send the sequence. You can:
Send it your existing list.
Upload a new list in CSV format.
Trigger through API description.
- Then, you will be redirected to a selected contact list with personalized parameters for the email heading. Here you can define parameters such as the user's first name.
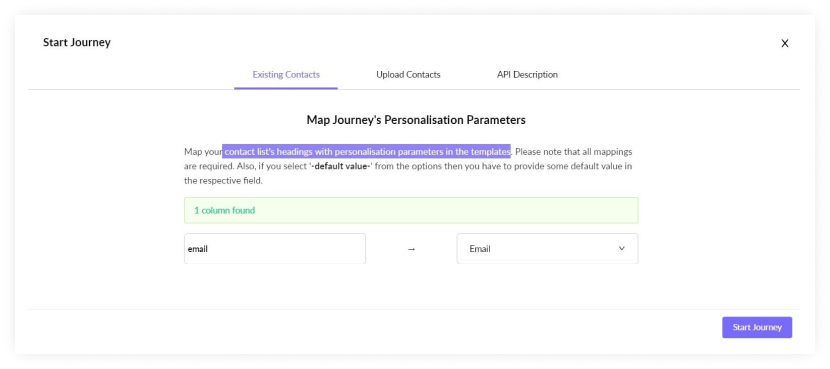
- After that, click on Start journey in the bottom right corner. Then you will see a statement that the 'recipient list has been queued for journey execution.'
Step 5: Tracking performance of email series
Once your journey is live, go to the journey's dashboard, and you'll see two options - Summary and Activity log.
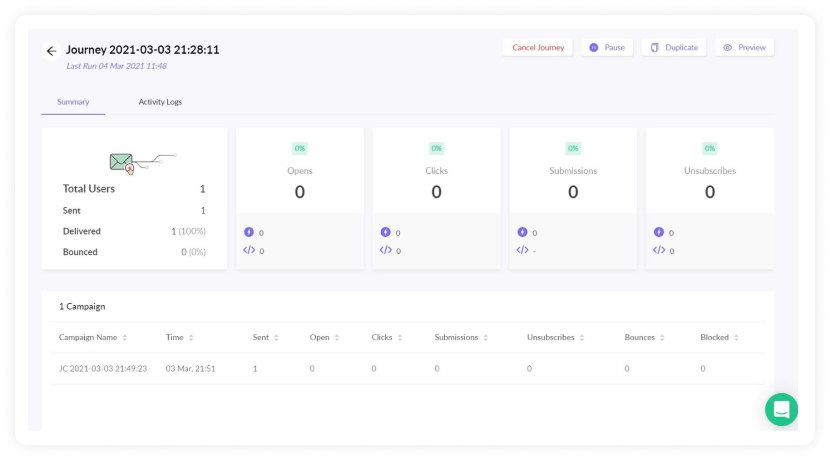
The summary section will get overall journey stats and individual campaigns.
Activity log records the journey activity: date, trigger method used, total users in the journey, users in progress (at any stage within the journey), and no. of steps completed/failed.
You can also choose to cancel or pause the journey by clicking on the buttons in the top right corner.
5 tips for building an email sequence that converts
To get the most out of sequence emails, we recommend following these five tips:
✅ Get insights from your sales team
Take inputs and insights from the sales team as they are directly connected with your brand and customers. You can get to know your prospect's journey better during each stage and integrate these learnings into your email series to move prospects in different pipeline stages.
✅ Maintain adequate intervals in email series
You mustn't overwhelm users with too many and too frequent emails. Doing so will only push subscribers away from your emails, no matter how compelling your subject line is. So, ensure that you send emails at intervals to give users time to absorb the previously sent email.
✅ Use team members' names in the email
Introducing your team and mentioning their name in the email sign-off can help make your email look more trustworthy and credible. It will also encourage users to reply to emails by contacting a human being, not some machine.
✅ Segment your email list
Segment your email list to send highly targeted emails. You can create users segments based on different criteria, such as
Demographic data: Age, gender, occupation, family size, etc.
Geographical data: Country, city, pin code, etc.
Psychographic data: Habits, values, lifestyles, etc.
Behavioral data includes how users interact and engage with your website, emails, and products. It also includes the user's lifecycle stage - new customers, inactive users, repeat customers, etc.
Another behavior base model you can use is the RFM model - Recency, Frequency, and Monetary.
Recency: The time interval between the user's last purchase interaction.
Frequency: How frequently users purchase, open, click on emails, etc.
Monetary: How much money do users spend.
✅ Send personalized emails
Segmentation is the stepping stone to creating personalized emails that appeal to individual emails. 69% of consumers appreciate personalization, as long as it's based on data they've shared with a business directly. Hence, personalization is your chance to showcase that and build connections with users.
✅ Always test your emails
Preview your emails to give users a better experience and avoid rendering or deliverability issues. You should also a/b test your emails by making different variations of a single email and sending it to segments of your audience to decide which one performs better.
✅ Track your performance consistently.
Without tracking the performance of your email sequence, your hard work, time, and efforts will go in vain. So to do that, track the right metrics such as click-through, conversions, etc. Monitoring your email performance by conducting an email marketing audit will help you understand which campaign is performing and which isn't. You can then work on improving the performance to nail your future campaigns.
Related guide: What Is Email Analytics and How Can You Use It to Optimize Your Campaigns
Wrap-up
An email sequence is a powerful strategy to help you understand your customer's journey, nurture them and compel them to convert. To level up your email series, you can try out AMP emails which allow your subscribers to take action within their email. Such functionality reduces redirects and thus encourages users to take action right away. With Mailmodo, you can add calendars for meetings, shopping acts, polls, and so on. Additionally, you can automate the entire process using our email automation platform.. So, try it out for yourself.
What you should do next
Hey there, thanks for reading till the end. Here are 3 ways we can help you grow your business:
Talk to an email expert. Need someone to take your email marketing to the next level? Mailmodo’s experts are here for you. Schedule a 30-minute email consultation. Don’t worry, it’s on the house. Book a meet here.
Send emails that bring higher conversions. Mailmodo is an ESP that helps you to create and send app-like interactive emails with forms, carts, calendars, games, and other widgets for higher conversions. Sign up now and send 10k free emails/month. Sign up here.
Get smarter with our email resources. Explore all our knowledge base here and learn about email marketing, marketing strategies, best practices, growth hacks, case studies, templates, and more. Access guides here.

